We hit this issue often and it can be frustrating. You have a bunch of technical challenges:
- Website Form Builder not working correctly
- DNS Settings
- Spam Filter / Firewall Settings
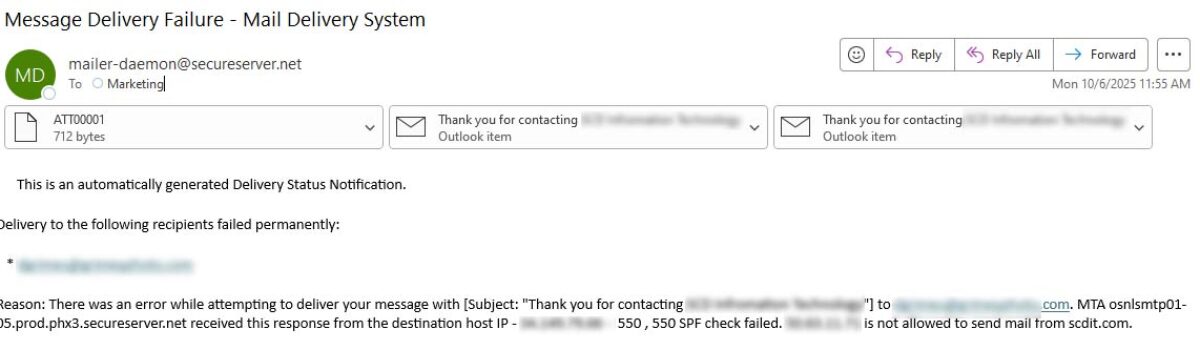
Our issue was the “auto-responder” wasn’t getting sent. We would get the first email; however, the second notification email the “auto-responder” wasn’t allowed to send. We would get an email saying:
“Message Dellivery Failure – Mail Delivery System” as the title, “mailer-daemon@secureserver.net“, and the “Reason: There was an error while attempting to deliver your message….”
In this particular instance the DNS was with Godaddy, the hosting was with Godaddy, but the email was O365. We added “include:secureserver.net” to our existing SPF record in the DNS. We got this setting from the following page.
https://www.godaddy.com/help/send-form-mail-using-an-smtp-relay-server-953
Let us know if this helped you…